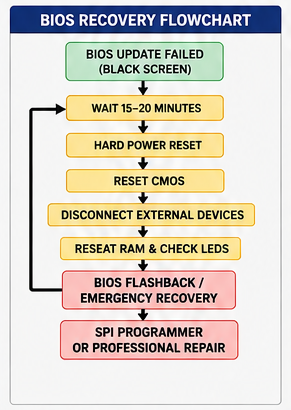
BIOS Update Failed Black Screen Fix : 12 Proven Solutions That Actually Work. Nothing is more frustrating than updating your BIOS only to discover that your computer no longer boots. You press the power button, the fans start spinning, keyboard lights may flash for a moment, but the monitor stays completely black. There is no manufacturer logo, no BIOS screen, and no Windows loading animation.
If you’re dealing with this situation, don’t panic just yet.
A failed BIOS update doesn’t always mean your motherboard is permanently damaged. In many cases, the system can be recovered using built-in recovery features, a CMOS reset, BIOS Flashback, or a few hardware checks. The right solution depends on what caused the update to fail in the first place.
In this guide, we’ll walk through the most effective methods to perform a BIOS Update Failed Black Screen Fix, explain why the problem happens, and show you how to recover your computer safely. Whether you’re using an ASUS, MSI, Gigabyte, Dell, HP, Lenovo, or Acer system, these steps will help you troubleshoot the issue methodically.
CH341A Programmer Software Free Download Latest Version
Quick Answer: How Do You Fix a BIOS Update Failed Black Screen?
If your computer shows a black screen after a BIOS update, try these solutions in order:
- Wait at least 15–20 minutes to ensure the update isn’t still running.
- Perform a hard power reset.
- Disconnect all unnecessary external devices.
- Reset the CMOS or clear BIOS settings.
- Reseat the RAM modules.
- Use your motherboard’s BIOS Flashback feature (if available).
- Try the laptop’s emergency BIOS recovery mode.
- Check diagnostic LEDs or beep codes.
- Reflash the BIOS using the correct firmware.
- If recovery fails, the BIOS chip may need to be reprogrammed or replaced.
Following these steps in sequence gives you the best chance of recovering your system without replacing the motherboard.
What Happens During a BIOS Update?
Before jumping into the fixes, it helps to understand what a BIOS update actually does.
The BIOS (Basic Input/Output System) or its newer replacement, UEFI firmware, is the low-level software stored on a chip on your motherboard. Every time you power on your computer, this firmware initializes the processor, memory, graphics hardware, storage devices, and other essential components before handing control over to your operating system.
When you update the BIOS, the existing firmware is erased and rewritten with a newer version. During this process, the motherboard temporarily has no working firmware. If anything interrupts the update—even for a few seconds—the firmware can become corrupted, leaving the system unable to complete the Power-On Self-Test (POST). That’s why the result is often a completely black screen.
Unlike a Windows update, a BIOS update works at the hardware level. If it fails, the motherboard may not even reach the stage where it can display an error message.
Why Does a BIOS Update Fail?
Understanding the cause can make troubleshooting much easier. Most failed BIOS updates fall into one of the following categories.
1. Power Interruption
A sudden power outage is one of the most common causes of BIOS corruption. If electricity is lost while the firmware is being written, the process stops immediately, leaving the BIOS incomplete.
For desktop PCs, using an uninterruptible power supply (UPS) during BIOS updates is highly recommended.
2. Incorrect BIOS File
Installing firmware intended for a different motherboard model—or even a different hardware revision—can prevent the system from booting.
Always verify:
- Motherboard model
- Hardware revision
- BIOS version
- Manufacturer’s support page
Even boards with similar names may require different firmware.
3. Forced Shutdown
Some BIOS updates appear to freeze, especially when updating embedded controllers or firmware modules. Restarting the computer too early can interrupt the process before it finishes.
If the update seems stuck, patience is often safer than forcing a shutdown.
4. USB Drive Errors
Many users update the BIOS using a USB flash drive. Problems can occur if the drive:
- Isn’t formatted as FAT32
- Contains corrupted files
- Has multiple BIOS files
- Uses unsupported partition formats
A clean FAT32 USB drive with only the required BIOS file is the safest option.
5. Overclocking Instability
An unstable CPU, RAM, or GPU overclock can cause crashes during firmware updates.
Before updating your BIOS, it’s best to:
- Load BIOS defaults
- Disable CPU overclocking
- Disable XMP or EXPO temporarily
- Ensure the system is stable
Common Symptoms of a Failed BIOS Update
Not every black screen points to the same issue. Recognizing the symptoms can help narrow down the cause.
| Symptom | Possible Cause |
|---|---|
| Black screen with spinning fans | Corrupted BIOS firmware |
| Power LED turns on but no display | BIOS cannot complete POST |
| Continuous reboot loop | Incomplete firmware installation |
| Keyboard lights flash once | BIOS initialization failure |
| Diagnostic CPU LED remains lit | BIOS incompatibility or corruption |
| No beep codes | BIOS isn’t executing correctly |
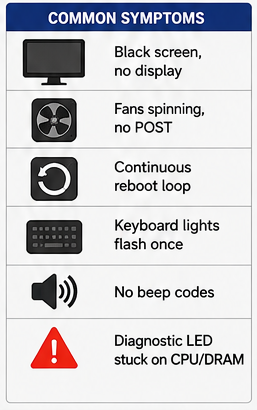
If you notice one or more of these symptoms after updating the firmware, there’s a good chance you’re dealing with BIOS corruption rather than a Windows problem.
Before You Start Troubleshooting
Resist the temptation to repeatedly press the power button or reset the computer. Doing so can sometimes make the situation worse, especially if the motherboard is still attempting to recover the firmware.
Instead, prepare the following:
- Your motherboard or laptop model number
- A second working computer (if possible)
- An empty USB flash drive (8 GB or 16 GB)
- A screwdriver for opening the case if needed
- Your motherboard manual or laptop service guide
Having these items ready will make the recovery process much smoother.
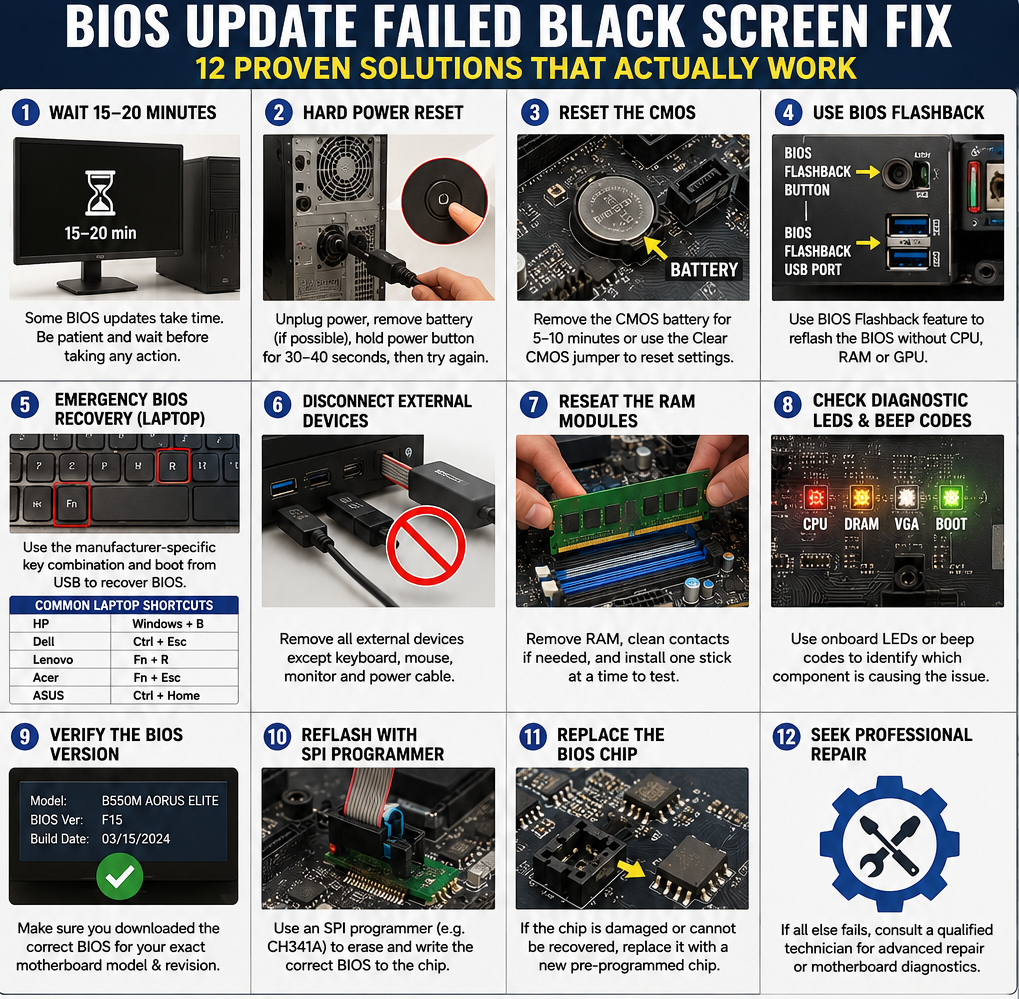
Solution 1: Wait Before Assuming the BIOS Update Failed
This may sound surprisingly simple, but it’s one of the most overlooked steps.
Some BIOS updates take much longer than expected, particularly on newer systems that update multiple firmware components, such as the embedded controller (EC), Intel Management Engine (ME), or AMD Platform Security Processor (PSP).
During this time, the screen may remain black while the motherboard completes internal programming.
How Long Should You Wait?
- Desktop PCs: 10–15 minutes
- Gaming laptops: Up to 20 minutes
- Business laptops: 15–30 minutes in some cases
If the fans are running steadily and the system hasn’t powered itself off, it’s often best to wait rather than interrupt the process.
Technician Tip: If you hear storage activity or notice status LEDs blinking, the firmware update may still be in progress. Interrupting it could turn a recoverable issue into a fully corrupted BIOS.
Solution 2: Perform a Hard Power Reset
If enough time has passed and the computer remains unresponsive, the next step is a hard power reset.
Residual electrical charge can occasionally prevent hardware from initializing correctly after a BIOS update.
Steps
- Turn off the computer completely.
- Unplug the power cable.
- Remove the laptop battery if it is removable.
- Hold the power button for 30–40 seconds.
- Reconnect the power supply.
- Start the computer again.
This procedure drains any remaining charge from the motherboard and forces the hardware to initialize from a clean state.
In some cases, this simple reset is enough to restore a normal boot.
Solution 3: Reset the CMOS to Restore Default BIOS Settings
If a hard power reset doesn’t solve the problem, the next step is resetting the CMOS.
The CMOS (Complementary Metal-Oxide Semiconductor) stores your BIOS configuration, including the system clock, boot sequence, CPU settings, memory timings, and hardware configuration. After a failed BIOS update, these settings can become corrupted or incompatible with the newly installed firmware, preventing the computer from completing POST (Power-On Self-Test).
Resetting the CMOS clears these saved settings and forces the motherboard to load factory defaults.
Method 1: Remove the CMOS Battery
Follow these steps carefully:
- Turn off your computer.
- Disconnect the power cable.
- Remove the laptop battery if it’s removable.
- Hold the power button for 30 seconds to discharge any remaining electricity.
- Open the computer case or remove the laptop’s back cover.
- Locate the silver coin-cell CMOS battery on the motherboard.
- Carefully remove the battery.
- Wait for 5–10 minutes.
- Reinsert the battery.
- Reconnect the power and turn the computer on.
If the issue was caused by corrupted BIOS settings, the system may boot normally after this reset.
Method 2: Use the Clear CMOS Jumper
Many desktop motherboards include a dedicated CLR_CMOS or JBAT1 jumper.
To use it:
- Disconnect the computer from power.
- Move the jumper to the clear position for about 10 seconds.
- Return it to its original position.
- Reconnect power and start the system.
Always refer to your motherboard manual for the correct jumper location.
Solution 4: Use BIOS Flashback (If Your Motherboard Supports It)
One of the best recovery features available on modern motherboards is BIOS Flashback.
Unlike a standard BIOS update, BIOS Flashback allows you to reinstall the BIOS even if the computer won’t boot. In many cases, you don’t even need a CPU, RAM, or graphics card installed.
Manufacturers that commonly include this feature include:
- ASUS
- MSI
- Gigabyte
- ASRock
If your motherboard has a dedicated BIOS Flashback USB port and a Flashback button, you have an excellent chance of recovering from a failed BIOS update.
What You’ll Need
- A working computer
- USB flash drive (8 GB or 16 GB)
- Correct BIOS file downloaded from the manufacturer’s website
Step-by-Step Instructions
- Format the USB drive as FAT32.
- Download the correct BIOS for your exact motherboard model.
- Rename the BIOS file if required by the manufacturer.
- Copy only the BIOS file to the USB drive.
- Insert the drive into the dedicated BIOS Flashback USB port.
- Connect motherboard power.
- Press and hold the BIOS Flashback button for several seconds.
- Wait while the LED blinks.
The flashing process usually takes between 3 and 10 minutes.
Important: Never disconnect power while the Flashback LED is blinking.
Once the LED stops flashing, restart the computer.
Many motherboards that appear “dead” after a failed update can be fully recovered using this feature.
Solution 5: Try the Laptop’s Emergency BIOS Recovery Mode
Unlike desktop motherboards, many laptops include a hidden BIOS recovery feature.
This emergency mode reloads the firmware from a USB drive without requiring a normal boot.
Although each manufacturer uses a different key combination, the recovery process is generally similar.
General Recovery Procedure
- Download the latest BIOS from the laptop manufacturer’s support page.
- Extract the recovery file.
- Copy the required BIOS file to a FAT32 USB drive.
- Turn the laptop completely off.
- Hold the recovery key combination.
- Connect the AC adapter.
- Press the power button while continuing to hold the keys.
If successful, the recovery utility will automatically begin reflashing the BIOS.
Common BIOS Recovery Keys
| Brand | Recovery Shortcut |
|---|---|
| HP | Windows + B |
| Dell | Ctrl + Esc |
| Lenovo | Fn + R |
| Acer | Fn + Esc |
| ASUS | Ctrl + Home (varies by model) |
These combinations differ between models, so always verify the correct method for your laptop.
Solution 6: Disconnect All External Devices
It may sound unrelated, but external hardware can sometimes prevent the motherboard from completing POST after a BIOS update.
Disconnect everything except:
- Keyboard
- Mouse
- Display (desktop only)
- Power cable
Remove:
- USB flash drives
- External hard drives
- Docking stations
- Printers
- Memory card readers
- SD cards
- USB hubs
- Gaming controllers
After disconnecting everything, restart the computer.
If the computer boots successfully, reconnect devices one at a time until you identify the problematic peripheral.
Solution 7: Reseat the RAM Modules
Memory issues frequently appear after BIOS updates because the firmware resets memory training values.
Even a slightly loose RAM stick can result in a black screen.
How to Reseat RAM
- Turn off the computer.
- Disconnect power.
- Remove the RAM modules.
- Inspect the contacts for dust or damage.
- Reinstall one RAM stick.
- Try booting the system.
- Repeat the process with each memory module individually.
Testing one stick at a time helps determine whether the problem is caused by faulty RAM or an issue with the memory slot.
Technician Tip: If your motherboard has four memory slots, begin testing in the slot recommended by the motherboard manual—typically A2.
Solution 8: Check Diagnostic LEDs and Beep Codes
Many modern motherboards include built-in diagnostic indicators that can help pinpoint the source of the problem.
Look for LEDs labeled:
- CPU
- DRAM
- VGA
- BOOT
If one LED remains illuminated, it indicates where the POST process stopped.
For example:
| LED | Indicates |
|---|---|
| CPU | BIOS corruption, processor issue, or unsupported CPU |
| DRAM | Memory problem or failed memory training |
| VGA | Graphics card not detected |
| BOOT | Boot device not found |
Older motherboards may instead use beep codes through the onboard speaker.
Listening to the beep pattern can provide valuable clues about the hardware preventing startup.
Solution 9: Verify the BIOS Version
One mistake many users make is installing the wrong BIOS revision.
Motherboards often have multiple hardware revisions, and using firmware intended for another revision can prevent the system from booting.
Double-check:
- Exact motherboard model
- Hardware revision number
- BIOS release notes
- Supported CPU list
If you accidentally installed the wrong firmware, reflashing the correct BIOS using BIOS Flashback or recovery mode may solve the issue.
Common Mistakes to Avoid
❌ Turning off the computer too early during the BIOS update.
❌ Downloading the BIOS for the wrong motherboard revision.
❌ Updating the BIOS while the system is overclocked.
❌ Using a corrupted USB flash drive.
❌ Interrupting BIOS Flashback before it finishes.
❌ Ignoring motherboard diagnostic LEDs.
Even experienced PC builders occasionally make these mistakes, so don’t assume the motherboard is permanently damaged until you’ve worked through the recovery steps.
Solution 10: Reflash the BIOS Using an SPI Programmer
If you’ve tried every recovery method and your computer still shows a black screen, the BIOS chip itself may be corrupted. At this point, software-based recovery methods usually won’t work because the motherboard can no longer read valid firmware.
Professional repair technicians solve this problem by programming the BIOS chip directly using an SPI programmer.
What Is an SPI Programmer?
An SPI programmer is a small hardware device that writes firmware directly to the BIOS chip on the motherboard. Unlike BIOS Flashback or emergency recovery modes, it doesn’t rely on the motherboard being able to boot.
Common SPI programmers include:
- CH341A USB Programmer
- EZP2019+
- RT809H (professional grade)
Using one of these tools, the technician can erase the corrupted firmware and write a clean BIOS image back to the chip.
Basic Recovery Process
- Disconnect the motherboard from power.
- Locate the BIOS chip (usually an 8-pin SPI flash chip).
- Connect the programmer using an SOIC8 clip or remove the chip if required.
- Read the existing BIOS and save a backup.
- Erase the corrupted firmware.
- Write the correct BIOS image.
- Verify the programming process.
- Reinstall or reconnect the chip.
- Test the motherboard.
Technician Tip: Always save the original BIOS before erasing it. Even if it’s corrupted, it may contain motherboard-specific data such as serial numbers or MAC addresses.
Warning: SPI programming requires experience. Incorrect connections or writing the wrong firmware can permanently damage the motherboard. If you’re not comfortable working with electronics, it’s safer to let a qualified repair technician handle this step.
Solution 11: Replace the BIOS Chip (If Necessary)
Some motherboards use a removable BIOS chip, while others have it soldered directly to the board.
If the BIOS chip has failed electrically—not just from corrupted firmware—reprogramming won’t help. In that case, replacing the chip is the next option.
Replacement is often practical if:
- The chip is socketed.
- A pre-programmed replacement is available.
- The motherboard is expensive enough to justify the repair.
For soldered chips, replacement requires hot-air rework equipment and should generally be left to professionals.
Solution 12: Know When Professional Repair Is the Best Option
Sometimes the BIOS update wasn’t the only issue. A power surge, failing motherboard component, damaged VRM, or faulty memory can produce the same symptoms as BIOS corruption.
Consider professional repair if:
- BIOS Flashback doesn’t complete.
- Emergency recovery mode never starts.
- CMOS reset has no effect.
- The system shows no diagnostic LEDs or beep codes.
- The BIOS chip requires programming or replacement.
- You’re uncomfortable opening the computer or handling motherboard components.
A qualified technician can diagnose the problem with specialized tools and determine whether the motherboard is repairable.
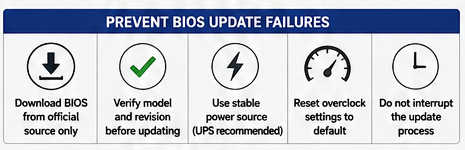
How to Prevent BIOS Update Failures in the Future
A failed BIOS update is stressful, but most cases are preventable with a few simple precautions.
1. Update Only When Necessary
If your computer is working perfectly and the BIOS update doesn’t address a problem you have, you may not need to update it. BIOS updates are useful for:
- Supporting newer processors
- Fixing hardware compatibility issues
- Improving system stability
- Addressing security vulnerabilities
Avoid updating the BIOS just because a newer version is available.
2. Download Firmware From the Official Manufacturer
Always obtain BIOS files from the official support page for your exact motherboard or laptop model. Avoid third-party download sites, as incorrect or modified firmware can leave your system unbootable.
3. Verify the Motherboard Model
Many motherboard series include multiple revisions that use different BIOS files.
Before updating, confirm:
- Model number
- Hardware revision
- Current BIOS version
Installing the wrong firmware is one of the most common causes of BIOS failures.
4. Use a Stable Power Source
A power interruption during the update can corrupt the BIOS.
- For desktops, use a UPS if possible.
- For laptops, keep the battery installed and the charger connected throughout the update.
5. Reset Overclocking Before Updating
If your CPU, RAM, or GPU is overclocked, return everything to default settings before flashing the BIOS. A stable system greatly reduces the risk of interruptions during the update.
6. Don’t Interrupt the Process
This is the most important rule.
Even if the screen appears frozen, never:
- Turn off the computer.
- Press the reset button.
- Remove the power cable.
- Disconnect the battery.
Some BIOS updates take much longer than expected, especially when additional firmware components are being updated.
BIOS Recovery Methods Comparison
| Recovery Method | Difficulty | Success Rate | Best For |
|---|---|---|---|
| Wait for Update to Finish | Very Easy | Medium | Update appears stuck |
| Hard Power Reset | Easy | Medium | Temporary initialization issues |
| CMOS Reset | Easy | High | Corrupted BIOS settings |
| BIOS Flashback | Easy | Very High | Desktop motherboards with Flashback support |
| Emergency BIOS Recovery | Medium | High | Compatible laptops |
| Reseat RAM | Easy | Medium | Memory initialization problems |
| SPI Programmer | Advanced | Very High | Corrupted BIOS chip |
| BIOS Chip Replacement | Advanced | High | Physically damaged BIOS chip |
Frequently Asked Questions
Can a failed BIOS update permanently damage a motherboard?
Not always. In many cases, the BIOS firmware becomes corrupted rather than the hardware itself. Features like BIOS Flashback, emergency recovery modes, or SPI programming can often restore the motherboard.
Will resetting the CMOS fix a failed BIOS update?
It can help if the issue is caused by corrupted BIOS settings. However, if the firmware itself is damaged, you’ll likely need a BIOS recovery or reflashing method.
How long should I wait before assuming the BIOS update has failed?
Wait at least 15–20 minutes. Some systems spend additional time updating embedded controller firmware or other low-level components, during which the screen may remain black.
Can I recover my files if the BIOS is corrupted?
Yes. A BIOS issue doesn’t usually affect the data stored on your SSD or hard drive. Once the computer is repaired—or if you connect the drive to another computer—your files should still be accessible.
Is BIOS Flashback available on every motherboard?
No. It’s available only on certain models. Check your motherboard manual or specifications to see if your board includes this feature.
Final Thoughts
A black screen after a BIOS update can feel like the end of the road, especially when your computer shows no signs of booting. Fortunately, many systems can be recovered without replacing the motherboard.
Start with the simplest solutions: wait long enough for the update to finish, perform a hard power reset, disconnect unnecessary peripherals, and reset the CMOS. If those steps don’t work, move on to BIOS Flashback or your laptop’s emergency recovery mode. These built-in recovery features are often enough to restore a system that appears completely unresponsive.
For more severe cases, professional techniques such as SPI programming or BIOS chip replacement can bring a motherboard back to life. The key is to troubleshoot methodically instead of assuming the hardware is beyond repair.
By following the steps in this guide, you’ll maximize your chances of successfully completing a BIOS Update Failed Black Screen Fix and getting your computer running again safely.
Key Takeaways
- A black screen after a BIOS update doesn’t always mean the motherboard is dead.
- Always wait at least 15–20 minutes before interrupting an update.
- Resetting the CMOS can resolve issues caused by corrupted BIOS settings.
- BIOS Flashback and emergency recovery modes are powerful built-in recovery tools.
- Reseating RAM and disconnecting external devices can resolve POST failures.
- Advanced recovery with an SPI programmer is often successful when software methods fail.
- Prevent future issues by using the correct BIOS file, a stable power source, and default BIOS settings before updating.