Change File Properties In Windows. In this article, you will read how to change file properties in Windows. You don’t need any 3rd party software to change the file properties like file metadata, media tags, file attributes, and extended image information. In Windows 10 or 11, you can do it very easily.
How To Change File Properties in Windows?
Method 1 – Using Details Pane:
You can change the file properties by using the details pane. It is one of the easiest and fastest ways to do this. Follow the steps below:
1.Press the Windows + E keys to open File Explorer.
2.Navigate to the file you want to change the properties.
3.Click on View.
4.Select Show.
5.The, select the Details Pane option.

6.Select the file you want to edit.
7.The details will appear on the Details pane.
8.Click on the File property value you want to edit and modify it as you want.
9.Save the changes.

Method 2 – Using Details Tab:
There is another easy way of modifying File properties. You can change them from the Details tab in the Properties window. Here is how you can do it:
1.Right-click on the file.
2.Select Properties.
3.Click on the Details tab.
4.Click on the details you want to change.
5.Make the changes and press the Enter key to confirm it.
6.Click on Apply and Ok to save the changes.

Method 3 – Removing File Properties:
You can also remove the file properties. Follow the steps below:
1.Right-click on the file.
2.Select Properties.
3.Select the Details tab.
4.Click on the Remove Properties and Personal Information option.

5.A new dialogue box will appear.
6.You can choose “create a copy with all the possible properties removed” or “remove the properties you want”.
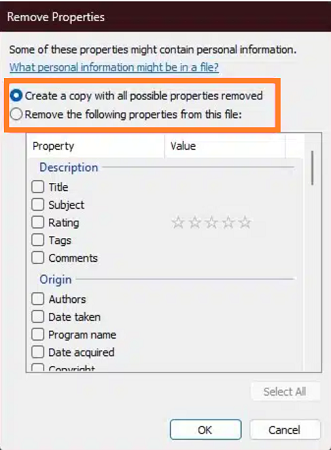
7.If you choose the first option, then it will remove all details.
8.If you choose the second option, you have to check the boxes of the properties you want to remove.
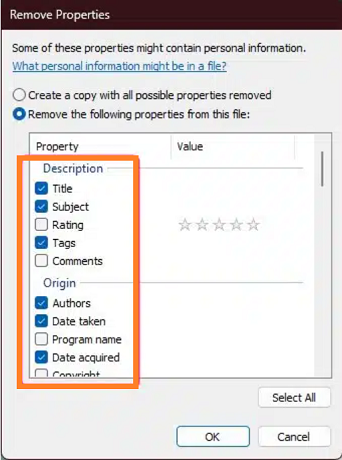
9.Choose your desired options.
10.Click on OK.
featured image source: https://www.howtogeek.com/