How To Enable Desktop Composition. In this article, you will read what is desktop composition and how to enable desktop composition.
What Is Dektop Composition?
Desktop Composition is a visual feature of Windows. It was first introduced in Windows Vista. It completely changed the display of pixels on the screen by the various applications. When the desktop composition is enabled, it means that individual windows will not draw to the primary display directly as it used to happen in earlier Windows.
The screen’s drawing is redirected to the off-screen surface in video memory, which is rendered desktop image and presented for us on the display.
The Desktop Window Manager (DWM) is the service behind the Desktop composition. It enables visual effects and features like the Aero theme on the desktop by using the Desktop Composition.
How To Enable Desktop Composition?
A few methods to enable desktop composition on Windows 7 and Vista are mentioned below:
Method 1 – Enable Through The Visual Effects Settings:
To enable from the Visual effects settings:
1.Right-click on This PC.
2.Select the Properties option from the pop-up menu.
3.Select the Advanced system settings option.
4.System Properties app will open on your screen.
5.Click on the Advanced tab.
6.Select the Settings option in the Performance section.

7.Now in the Visual Effects tab, locate and check the Enable desktop composition box.
8.You can disable desktop composition by unchecking that box.
Method 2 – Enable From Services:
To enable desktop composition through the Services:
1.Type services.msc in the Windows search bar.
2.Select the top option to open the Services app on your screen.
3.Locate the Desktop Window Manager Session Manager service.
4.Double-click on it.
5.In the General tab, click on the drop-down menu beside the Startup Type.
6.Select the Automatic
7.Then, click on the Start option.
8.Finally click on Apply and OK to save the changes.
Changing the Startup type to Disable will disable it.
Method 3 – Enable Through Registry Editor:
To manually enable it through the Registry Editor:
1.Type regedit in the Windows search bar.
2.Select the appropriate option.
3.Navigate to the location given below:
HKEY_CURRENT_USER\Software\Microsoft\Windows\DWM
4.Then, double-click on the CompositionPolicy DWORD in the right panel.

5.Enter 0 in the Value Data section.
6.Click on OK.
7.Finally, close the Registry Editor and restart your computer.
Enter the value 1 if you want to disable it.
Method 4 – Enable From The Local Group Policy Editor:
To use the Local Group Policy Editor:
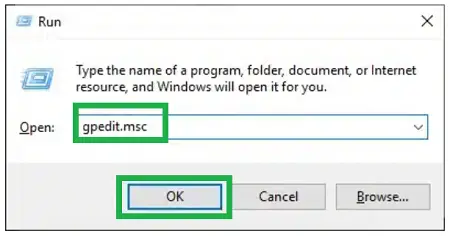
1.Type gpedit.msc in the Windows search bar.
2.Select the appropriate option.
3.In the left panel, first expand the User configuration option.
4.Next expand the Administrative Templates option.
5.Then expand the Windows Components.
6.Now, click on the Desktop Window Manager in the left pane.
7.Right-click on the Do not allow desktop composition option in the right pane.
8.Click on the Edit option from the pop-up menu.

9.Select the Not Configured or Disabled option to enable Desktop composition.
10.At the end, click on Apply and OK to save the changes.
11.Restart the computer and the desktop composition will be enabled.
To disable it, select the enabled option