How To Remove Bloatware In Windows 10. In this article, you will read methods to fix bloatware easily in Windows 10. Removing bloatware from your Windows 10 PC can significantly improve its performance and save valuable resources. Bloatware refers to the pre-installed applications that come with Windows 10, many of which are unnecessary for most users. Here are the steps to remove bloatware.
How To Remove Bloatware In Windows 10?
Method 1 – Uninstall Unnecessary Apps:
The first thing you have to do is to identify which applications are unnecessary to remove the Bloatware. To do so:
1.Click on the Start menu.
2.To open Settings windows, click the gear icon.
3.In the Settings window, click on “Apps” to open the Apps & features page.
4.Scroll through the list of installed apps.
5.Select the one you want to remove.
6.Click on the app.
7.Click the “Uninstall” button.
8.Repeat this process for each app till the bloatware gets removed.
Method 2 – Use PowerShell to Remove System Apps:
You can also remove the system apps via PowerShell. Some pre-installed apps cannot be removed through the Settings menu. So you have to use PowerShell. It is a powerful scripting tool. To do so:
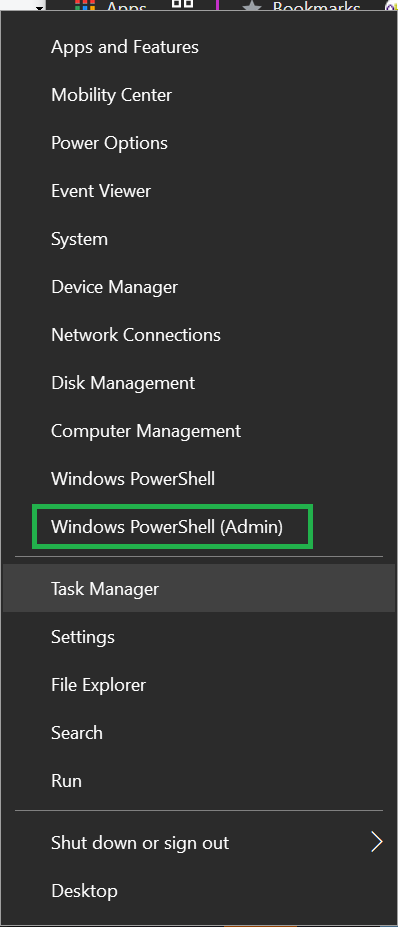
1.Open PowerShell as Administrator.
2.Right-click the Start button .
3.Select “Windows PowerShell (Admin)”.
4.Type the following command to remove a specific app.

5.Keep remember to replace the ‘appname’ with the name of the app you want to remove for Xbox app, type:

Method 3 – Use Any Third Party Software:
If you prefer a more user-friendly approach, you can use third-party software designed to remove bloatware. Two popular options are:
CCleaner: A comprehensive tool that can uninstall unwanted programs and clean up your system.
Decrap: Specifically designed to remove bloatware from Windows systems.
Using CCleaner
Just download CCleaner from the official website and install it. Then, follow the steps below:
1.Open CCleaner.
2.Launch the program.
3.Go to the “Tools” section.
4.Select the programs you want to remove and click “Uninstall”.
Method 4 – Disable Startup Programs:
Some bloatware applications may run automatically when you start your computer, slowing down the boot process. Disabling these programs can improve startup time. Follow the steps:
1.Press Ctrl + Shift + Esc to open Task Manager.
2.Go to Startup Tab.
3.Click on the “Startup” tab to see a list of programs that start with your computer.
4.Right-click on the programs you don’t need and select “Disable” to disable unnecessary programs.
Method 5 – Clean Up Your System:
After removing bloatware, it’s a good idea to clean up any remaining files and optimize your system. Use Disk Cleanup for this purpose.
1.Open the Start menu.
2.Type “Disk Cleanup”.
3.Select the tool.
4.Select the drive you want to clean (usually C:).
5.Follow the on-screen instructions.
6.Open the Start menu
7.Type “Defragment and Optimize Drives”.
8.Select the tool.
9.Choose the drive you want to optimize and click “Optimize.”
Removing bloatware from your Windows 10 PC can enhance its performance and provide a cleaner, more efficient user experience. Whether you choose to uninstall apps manually, use PowerShell, or rely on third-party software, following these steps will help you achieve a bloatware-free system. Regular maintenance, such as disabling startup programs and running disk cleanup, will ensure your computer remains optimized and clutter-free. You can enjoy a faster, more responsive Windows 10 experience.