Windows Security Center Service Can’t Be Started. In this article, you will read what causes Windows Security Center Service Can’t Be Started error and how to fix Windows Security Center Service Can’t Be Started error.
Have ever got a Windows Security Center Service Can’t Be Started error message when you started Windows Security Center? Windows Security Center detects the threats in the PC. If it stops working, then your computer might be at risk of any harm from viruses or malware. Many users have reported this error that Windows Security Centre gets turned off suddenly without any consent. And when you try to open it, a message pops up stating The Windows Security Center Service Can’t Be Started.

What Are The Causes Of The Windows Security Center Service Can’t Be Started Error?
There can be various reasons of Windows security center service can’t be started in Windows 10 error, like:
-Malware or virus is restricting the service from running.
-Log on user option is not configured correctly.
-Any issue in the security centre that may stopping it to start correctly.
How To Fix Windows Security Center Service Can’t Be Started Error?
Method 1 – Configure And Enable Windows Security Center:
As we have discussed earlier if Windows Security Centre is not configured properly, then this issue can happen. To enable the Windows Security Centre:
1.Press the Windows logo key + R button at a time.
2.Run dialogue box will open.
3.Type “services.msc” there.
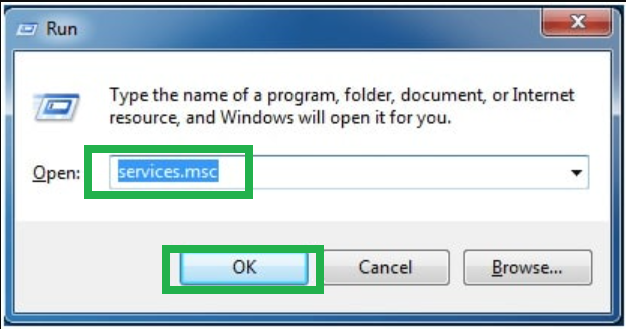
4.Click the “OK” button or press enter to proceed.
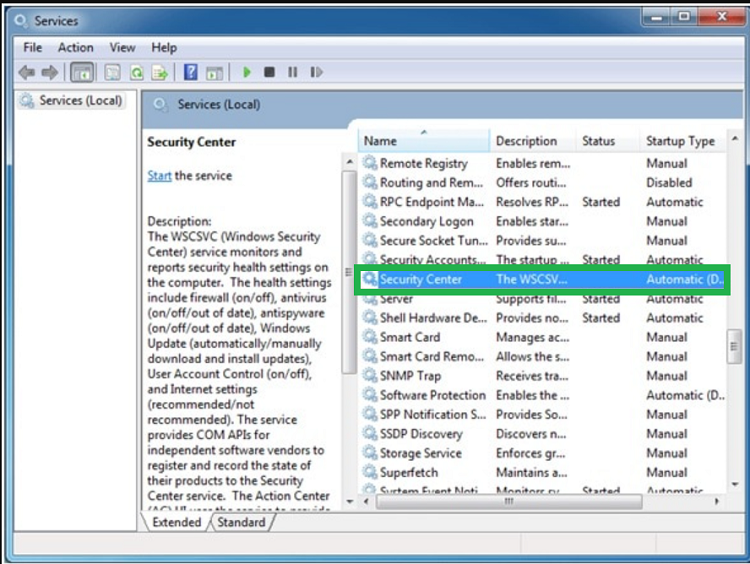
5.A pop-up service window will open.
6.Double click on the Securit Center there.
7.A general tab will open.
8.Find the “Startup type” option there.
9.Change it to Automatic.

10.Then, change the Service status to start just by pressing the Star button.
11.Click the OK button to continue.
12.Now Windows Security Center is ready to start.
13.Restart your PC.
14.Check if you can use Windows security center or not.
15.If the issue is still there, then enter the Service window again.
16.Search for Remote Procedure Call and Windows management instrumentation service.
17.Change the startup type and the service status to Automatic and started.
18.Now, again check whether you can open Windows Security Center or not.
Method 2 – Run It As A Local Service:
Make sure that the Windows security service is running under local service. To do so:
1.Press the Windows logo key and “R” button at a time.
2.The Run dialogue box will appear.
3.Type in “services.msc”.
4.Click OK and press Enter key to continue.
5.A pop-up window will be seen on the screen.
6.Find Security Center from there.
7.Double click on it.
8.Navigate to the login option in the same window.
9.Click on “This account” option.
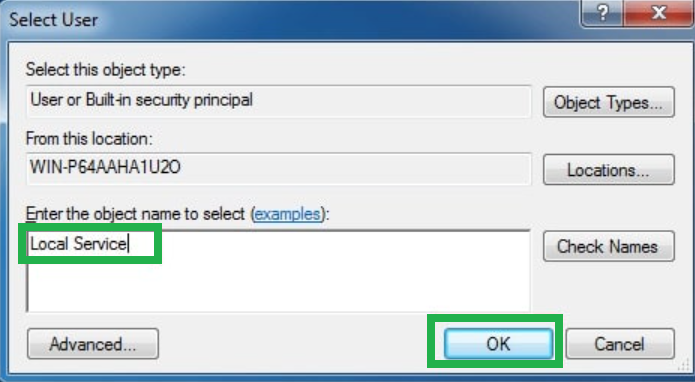
10.Click “Browse” to proceed.
11.then, type “Local Service” in the empty box.
12.Press “OK”.
13.Enter a password and confirm it.
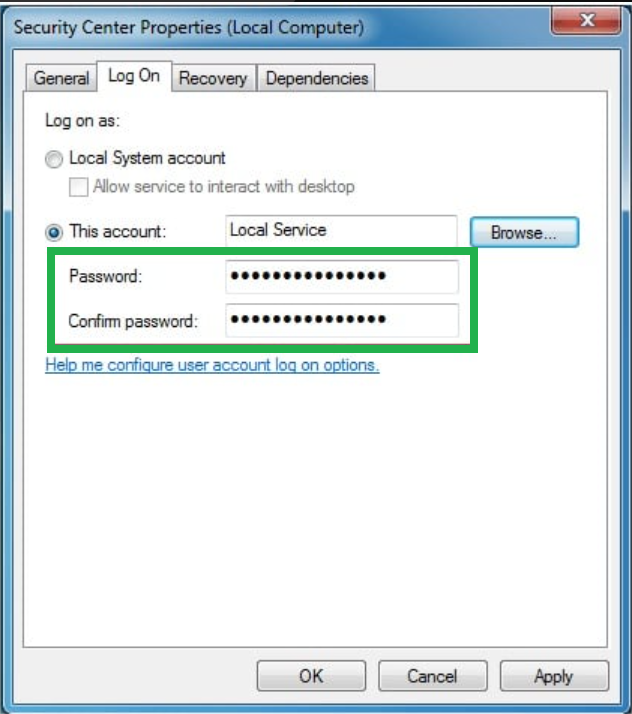
14.Hit the “OK” button.
Method 3 – Fix WMI repository:
To fix this error fixing the WMI Repository can fix it. To remove the Windows security center service can’t be started in Windows 10 error by repairing the WMI Repo:
1.Press the Windows logo key.
2.Type cmd in the search menu.
3.Select the command prompt.
4.Click on Run as administrator.
5.Now type “winmgmt /verifyrepository” in the pop-up window.
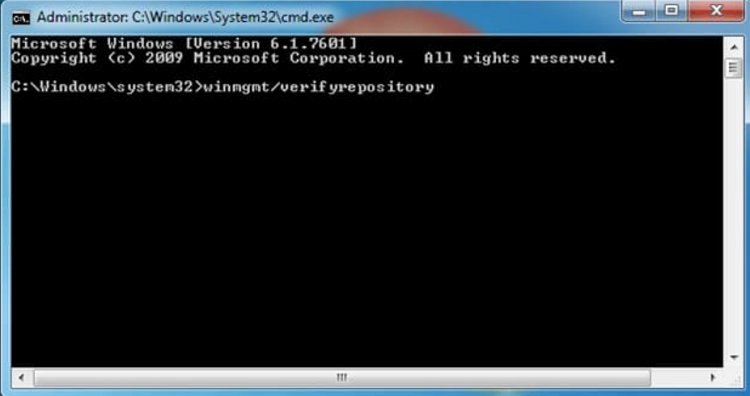
6.Press the enter button to check the repository.
7.Now you will get a message “WMI repository is consistent”.

8.If you get that message than WMI Repository is not causing the error. And, if you get the message “WMI repository is inconsistent”, then you have to repair it,
9.Open the command prompt.
10.Type “winmgmt/salvagerepository” in the command prompt.
11.Press Enter when the pop-up window appears.
12.Now, you will get a message “WMI repository has been salvaged”.
Method 4 – System File Check:
The corruption in the file system can cause this error. You have to run the system file checker to fix this error. Follow the steps:
1.Type “cmd” in the search bar to open the command prompt.
2.Right click on “Run as administrator” option.
3.A pop-up window will appear.
4.Select “Yes”.
5.Command prompt will open now.
6.Type “sfc /scannow”.
7.Press the enter button.

8.When the scanning gets finished, search for corrupted files.
9.Repair or remove the same file.