WLAN AutoConfig Service Not Working Issue. In this article, you will read about why is WLAN AutoConfig Service not working and solutions to fix WLAN AutoConfig Service not working.
WLAN AutoConfig Service is a built-in tool found in Windows for the PC that has a wireless adapter installed on them. It is used to detect wireless networks and connect with them. Many users have reported that the wireless AutoConfig service (wlansvc) is not running. So, here will first discuss why Windows Wireless Service is not running and then troubleshoot the WLAN AutoConfig Service Not Working Issue.
Why Windows Wireless Service Is Not Running?
Here are some reasons why Windows Wireless Service is not running:
1.Wireless AutoConfig service is disabled.
2.Network settings are corrupted.
3.Drivers are outdated.
4.Operating system is corrupted.
5.System Files are corrupted.
How To Fix WLAN AutoConfig Service Not Working Issue?
So, we have discussed the reasons why this problem is happening. Now, we will troubleshoot all of them one by one.
Solution 1 – Enable The WirelessAutoConfig Service:
If the WirelessAutoConfig service is disabled, then this problem might happen, Enabling the service can solve the problem. To do so, follow the steps below:
1.Press the Windows+ R keys to open the Run dialogue.
2.Type services.msc.
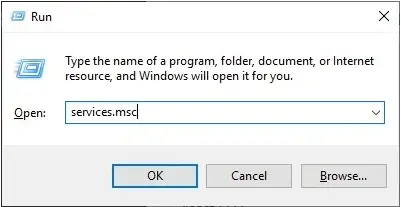
3.Click OK.
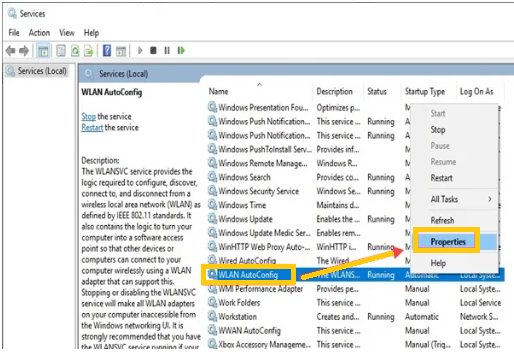
4.The Services console will get open.
5.Now, scroll down and navigate the WLAN AutoConfig service, right-click on it.
6.Click on the Properties option from the pop-up menu.
7.Under the General tab, beside the Startup type select Automatic.
8.Click on the Start option.
9.Click on Apply and press OK to save the changes.
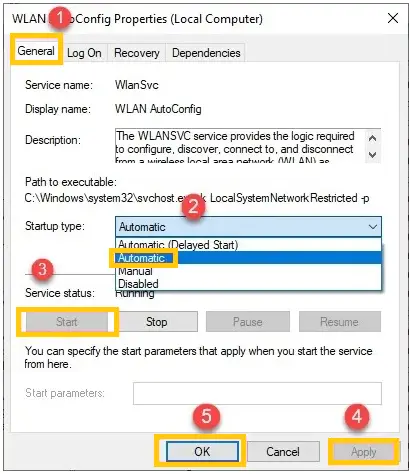
10.Restart the computer to see if the problem is gone.
Solution 2 – Reset TCP/IP Settings:
A corrupted network setting can also cause this problem. Many users have reported that resetting the TCP/IP settings can fix this problem. To reset the settings, follow the steps below:
1.Open the Run utility again.
2.Type cmd.
3.Press the Ctrl + Shift + Enter keys. This will open an elevated Command Prompt.
4.Now, type ” netsh int ip reset resettcpip.txt ” in the command prompt.
5.Then press Enter. This would reset the TCP/IP.

Solution 3 – Update The Driver:
If the WLAN adapter driver is outdated then try to update it, to fix this problem. To update the WLAN drivers, follow the steps given below:
1.Open the Run utility again.
2.Type devmgmt.msc
3.Click on OK. The device manager will get open on the screen.

4.Search for WLAN Adapter driver and right-click on it.
5.Select the Update driver option.
6.Follow the instructions given by the update wizard to update the driver.
7.Restart the computer to check if the problem is solved.
Solution 4 – Re-install The Windows:
A corrupted Windows can cause this error. So, reinstalling is the only solution for it. To reinstall the Windows, follow the steps:
1.Insert the DVD or USB installation device.
2.Restart the PC to enter the Boot menu.
3.Press F10 after restarting the PC to have an access to the Boot Override Menu.
4.Change the boot option to the device from which you want to install the WIndows.

5.Select the Save and Restart to initialize the Windows setup program.
6.Select your language, time and currency format and input method.
7.Press the next option.
8.Press the Install Now button and enter the Windows activation key.
9.Click on the Custom Install Windows only (advanced) option.

10.All the drives of your hard disk will be shown on the screen.
11.Delete all the drives and install the Windows on the desired drive.

Solution 5 – Delete The System Files That Are Corrupted:
The corrupted system files can cause many problems including this one. There is a built-in System File Checker utility in the WIndows to check the corrupted system files and delete them. To run System File Checker, follow the steps given below:
1.Type Command Prompt in the Windows search bar.
2.Right-click on the appropriate option.
3.Click on the Run as administrator option. The Command Prompt with administrative privileges will get open.
4.Now, type ” sfc /scannow ” in the command prompt and press Enter.

5.Wait for the scan to finish, and then restart your computer.
featured image source: thegeekpage.com